Samsung Laser "Replace imaging Unit" how to clear this message

Today I had to print something, it was important and urgent, this of course triggers the hardware gremlins to come out to play and my Samsung C460 all in one laser/fax/scanner/Goblin Teasmaid played the trump card “Replace imaging unit” and sat there stoically flashing a red light until new hardware was available.

Some net searching showed this to be the entire drum which given the age and light duty seemed not entirely necessary.
The price drew out some mid-level expletives too.

I also found an article where the condition could be reset but it involved burning out a resistor.

This intrigued me, I couldnt find any resistors but I found a slightly better way I think.

NOTE: this is only intended to be used if you are at the stage where the next step could be opening the door and launching the entire unit as far as you can into the undergrowth.

Open the printer front and look at the connectors, there are four sets of connectors on the four toner cartridges but there are Five sets of pins


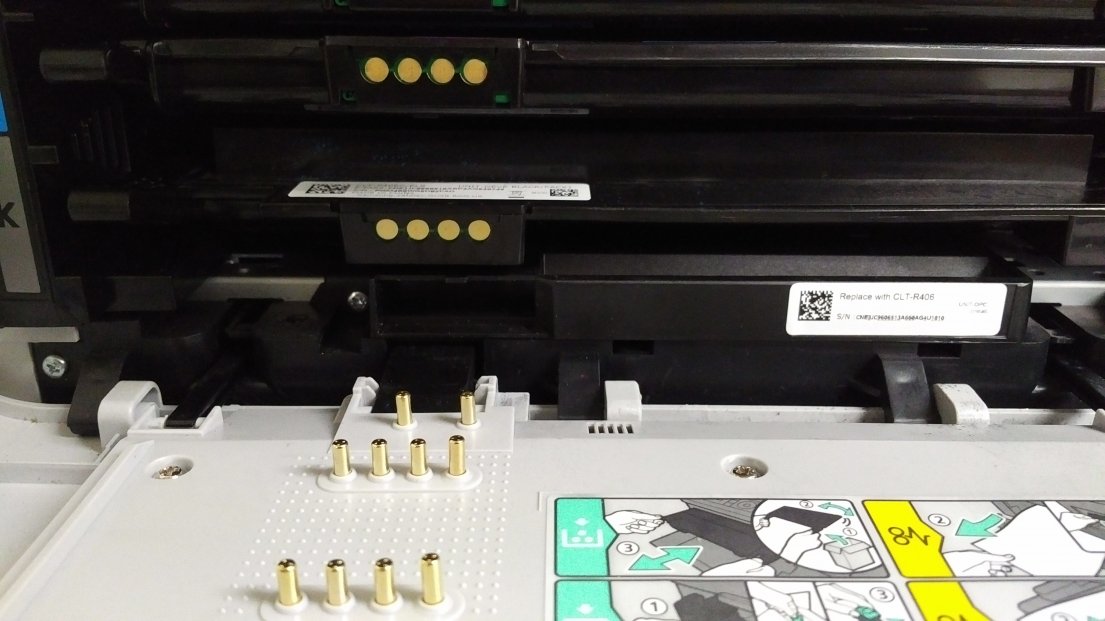
The bottom connector has two pins and in the unit marked CLT-R406 mate with fresh air and nothing else.

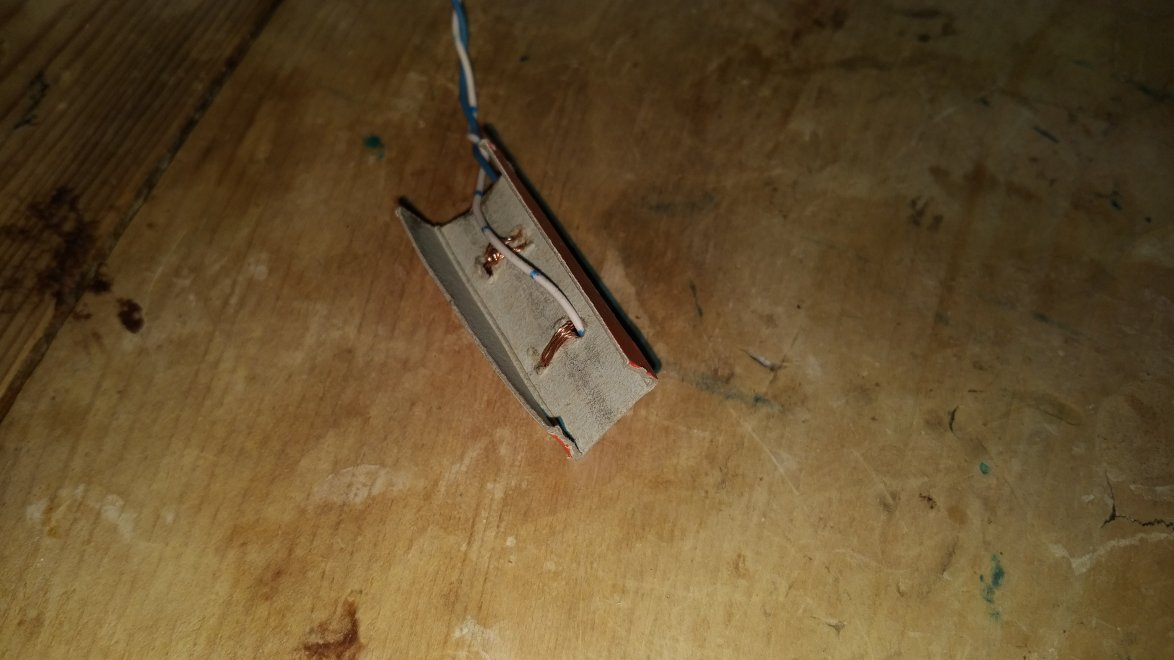
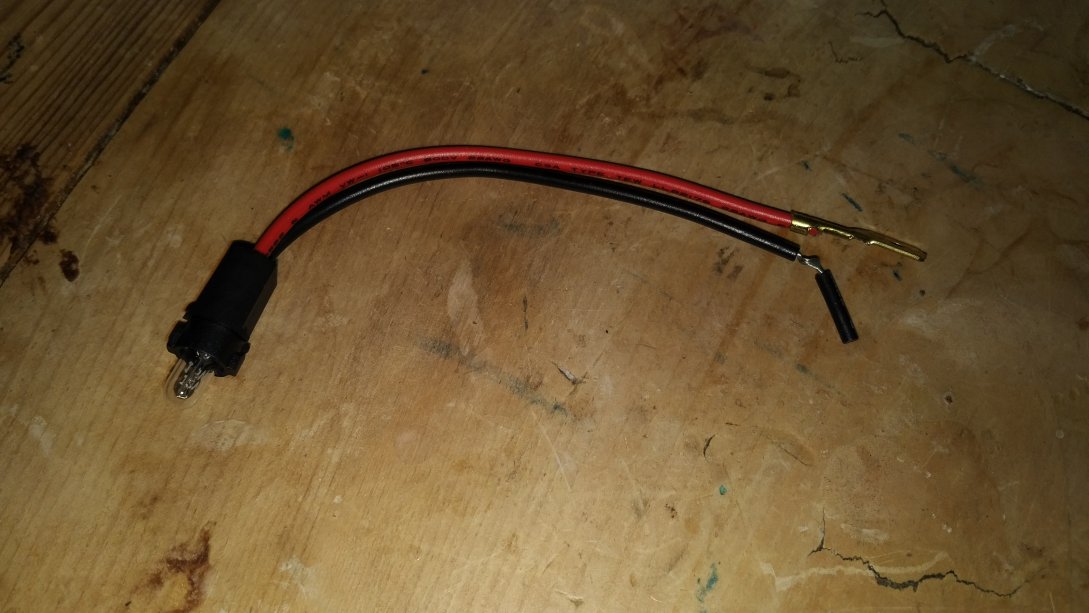
In the style of many childrens programs I fashioned a break-out lead to mate with these pins from some cardboard and thin cable


Then I pushed this into the empty bit where it could mate with the pair of pins at the bottom and shut the printer front panel.


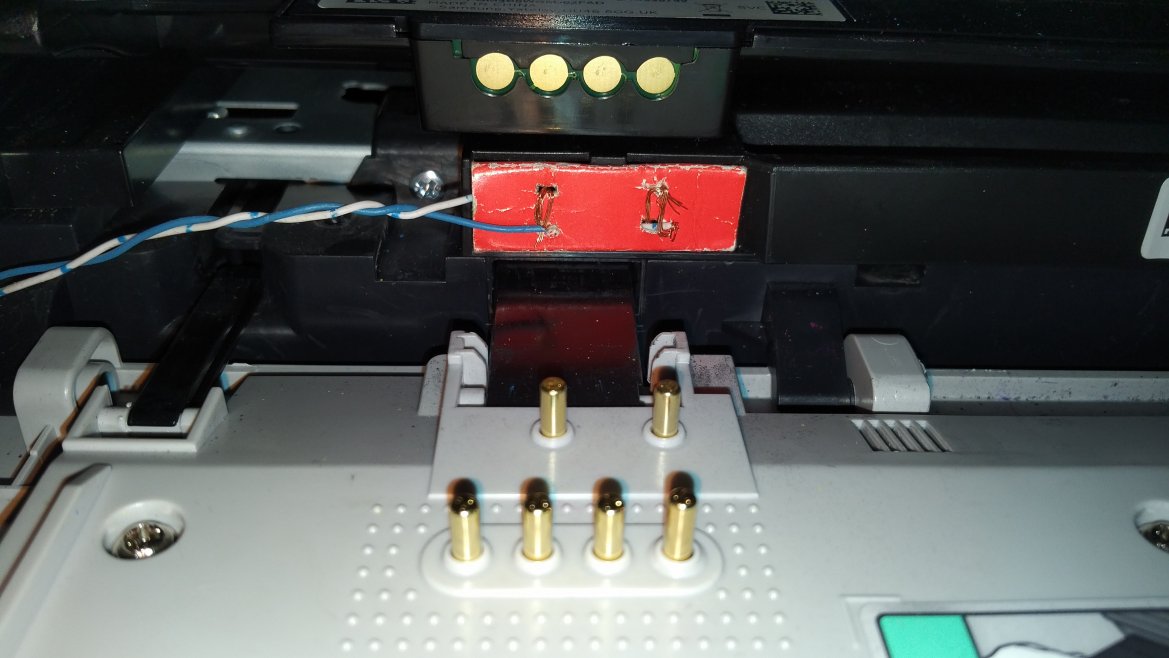
When I stuck a volt meter onto the wires and turned the printer on, it showed about 2.7v so I moved on the secret weapon.
This is a 12v 1.5w bulb as used in car dashboards, mine came from a cigarette lighter/power socket I had in the spares box.


On first power up there was the usual power up dialogue then the light flashed three times, however the annoying red light and “replace imaging unit” message were still present.

I think the burnt resistor method used elsewhere works by simulating a fusible link in the new imaging unit.

I power cycled the printer and after two flashes of the bulb I pulled off the wire aaaaaaaaand BINGO! the message cleared, the red light went green and it became a printer again, running through a setup and calibration.

As the printer has only been through five sets of toner cartridges I think its unreasonable to be changing a toner drum at this stage, if the image quality had degraded there would be no argument but it hadn’t changed at all.

wot - no lump hammer?

I have yet to use one of my birthday presents, but it is close at hand, just in case of an emergency


Nicely done TFW. Only issue is… the lump hammer is upside down :slight_smile:

Hi… When you get the error message, Replace imaging unit, 0 estimated pgs remain.This means the imaging unit has reached end of life and needs to be replaced. The device will not print, and this message will not be cleared, unless you replace it with part number
Vertical streaking. If the imaging unit is near end of life, or the device has had problems with non standard toner, vertical streaks may occur on the page. Replacing the imaging unit will resolve the problem.

“This is the first time TeraWales has posted — let’s welcome them to our community!”


The printer is still working as best it ever did, I sold it to somebody more patient and bought a Brother printer.
I believe you are one of three options

1 - A person that works for Samsung paid to follow forums posts in the mistaken belief I will actually buy genuine parts for £LOL to fix a software generated error.

B - Wrong

iii - A bot

Welcome to the forums
:wave:

PS: I still have the Cardboard Unit Now Tested In Samsung Hardware
I could register the design and license it to you, I’ll work on a better acronym first.

lol - nice :slight_smile:

I think that acronym works rather well :joy:

A brief duckduckgo search for his username shows forums littered with single posts.
Each with a block of slightly relevant text so I am convinced its just a bot that is crossposting between forums.

Its clever but not hugely useful unless it replicates and suddenly snowstorms every forum with drivel from other forums effectively choking them all with each others data.

This could be the waking gurgle of Skynet reaching self-aware status

Or some spotty script kiddy that is going to avalanche the world with messages to watch a particular YouTuba

Hi your method took around 5 reboots to work, but it did the trick, I just connected to wires attached to the bulb and wrapped the other end around each terminal, the lamp flashed 3 times but eventually decided to spring into life.

Glad it worked for you!
Samsung dont need to get money for this sort of thing

You can use the resistor just use a 1/2 watt resistor and it won’t burn like the 1/4 watt one shown in the video. Wrap it around the terminals just like the video, power on the printer for about 3 minutes then power it off and take out the resistor. It reset my error and showed 100% life for the imagine unit after that.

Excellent work, if you didn’t have to spend out and the printer works perfectly afterwards that is a fine result.

I seem to remember the printer had a “Toner Bin” as well that seemed to end up with rather a lot of waste toner in it.
This has a beam break sensor that will also stop the printer until the bin is emptied.

The 12v light I used above is now part of an upgrade to a Nissan Micra, I fitted the lighter/Power socket and added 25% to the value of the car.

1 Like